Tips for Teaching Online with Zoom
Shivani Manohar
July 8, 2020
‧
6 min read

📺 We are hosting our first ever webinar on Saturday: Tips for Teaching Online using Zoom. Registrations are now open!
Keeping in mind the phenomenal rise in Zoom meetings and video conferences recently, here are some tips and tricks for educators who have shifted their classes to Zoom.
The key features can be broadly divided into three categories, depending on when they are most useful:
📅 Pre-Class:
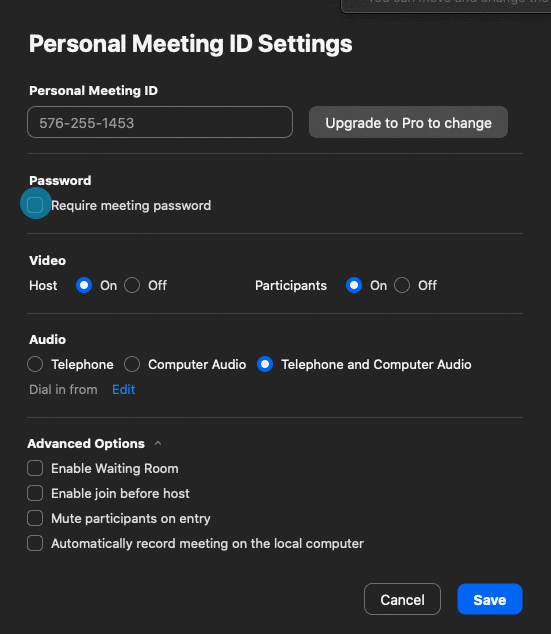
Using your Personal Meeting ID, you create a virtual meeting room that is permanently reserved for you or anyone who uses that ID. This is ideal for classes that you take regularly because students can access the meeting using the same ID and password every time.
💡 Tip: Your PMI remains uniform for all meetings you have and can only be changed if you upgrade to the paid version of Zoom.
💡 Tip: Remember to turn on the Require Meeting Password option for added security for your classes.
A helpful link to understand this feature better: Using Personal Meeting ID (by Zoom)
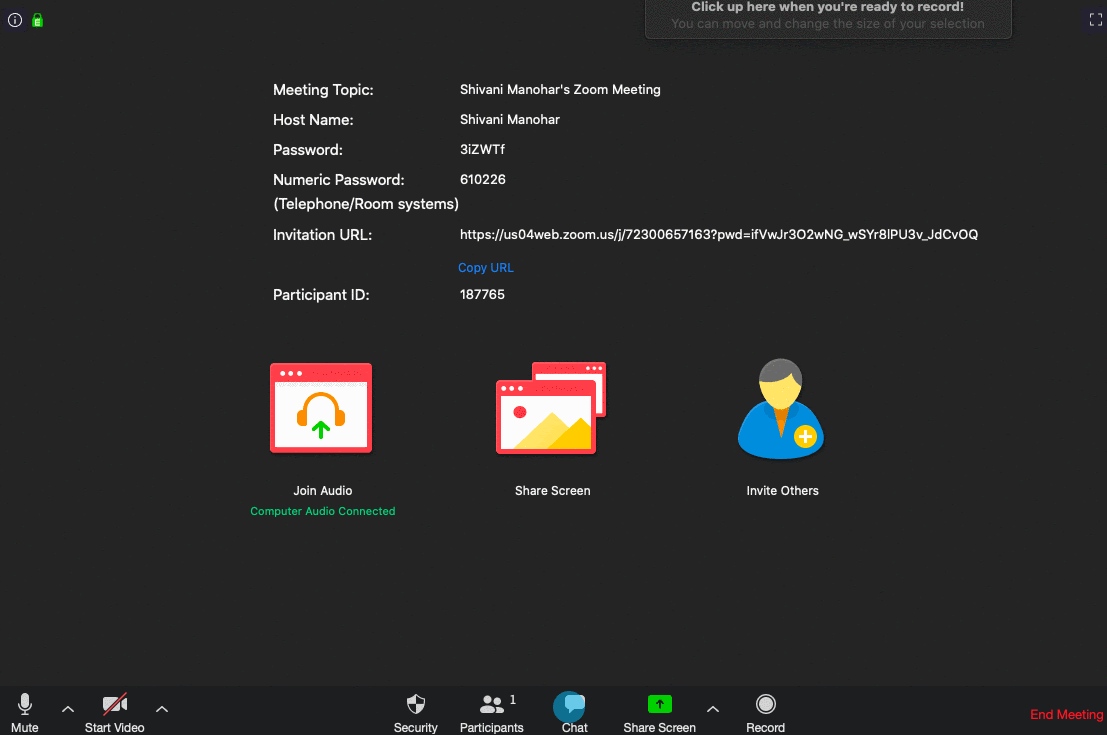
Host control allows whoever the host is to control different aspects of a Zoom meeting. During an online class, you, as the host, will be able to grant access to your students to enter the zoom meeting, invite more students or other faculty members to join, mute or unmute the participants according to your need and even record your online class for future reference.
A helpful link to understand this feature better: Host Control Guide (by Zoom)

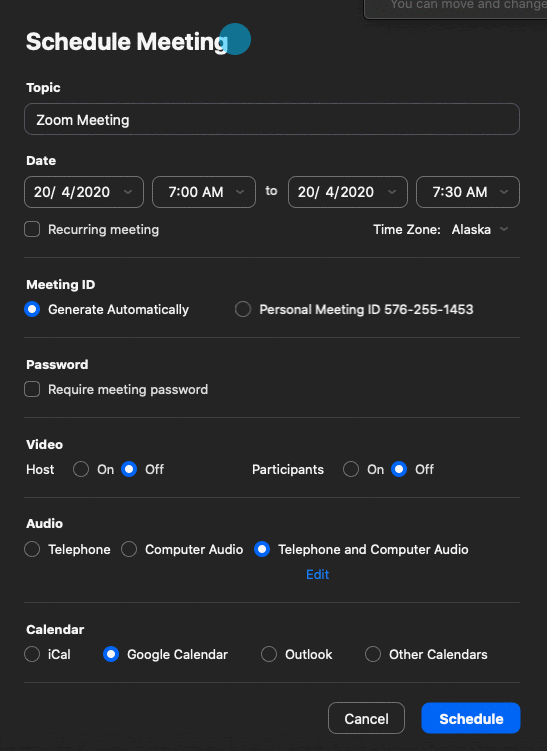
This feature is helpful for when you need to schedule a class in advance. If your class repeats every day or every week, you can select the Recurring Meeting option and Zoom will send you reminders before each session.
💡 Tip: You can schedule classes directly from ReportCard - Scheduling and Conducting Online Classes
A helpful link to understand this feature better: Scheduling a Meeting (by Zoom)
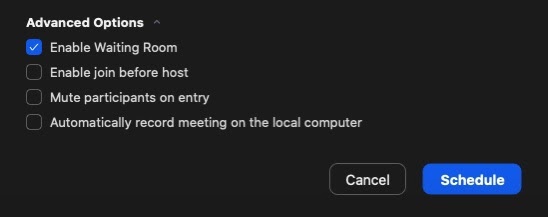
Enable the Waiting Room feature to avoid losing track of your students and give yourself the authority to admit the attendees at your own discretion. This creates a virtual waiting room for your students until you allow them into your class session. You can turn on this feature by clicking on Schedule > Advanced Options > Enable Waiting Room
📖 During Class:
The whiteboard feature works especially well if you don’t have any specific texts that you want to teach from, but prefer to use diagrams and/or examples not available online. This feature allows you to write or draw, add text boxes, or even use a ‘spotlight tool’ which works in a manner similar to a laser pointer during a presentation. You can create upto 12 whiteboards.
A helpful link to understand this feature better: Sharing a Whiteboard (by Zoom)
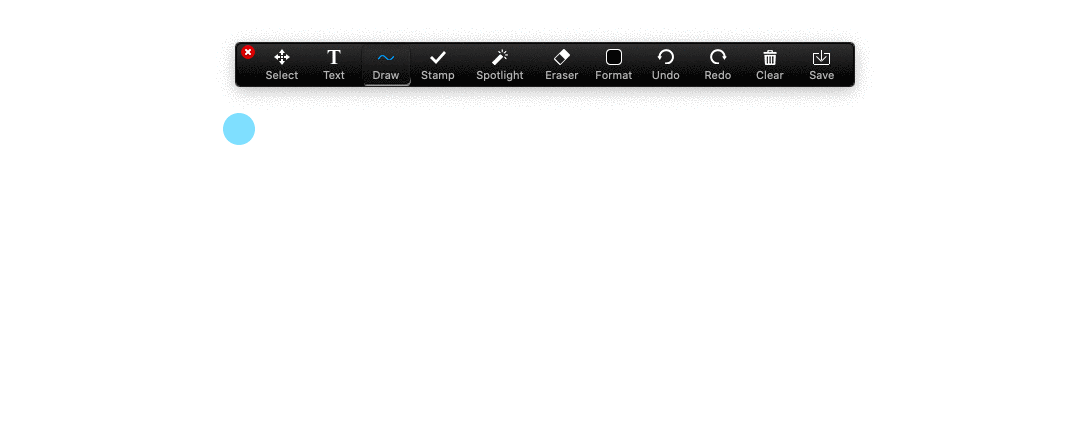
Once you start sharing your screen, you can use the Annotation features to help you teach more effectively. The various tools available under the annotation feature are similar to those available in the Whiteboard.
A helpful link to understand this feature better: Using Annotation Tools (by Zoom)
Screen sharing is a helpful feature for teachers because it allows them to mirror their devices onto their students’ screens, in order to explain their syllabus better. You can easily share documents or files available online or on your desktop and explain them as you go along.
💡 Tip: For better control over the session, change the screen sharing setting to ‘Host Only’. You can do this by clicking on the upward arrow next to Share Screen > Advanced Sharing Options > Who Can Share > Only Host
A helpful link to understand this feature better: Sharing Your Screen (by Zoom)
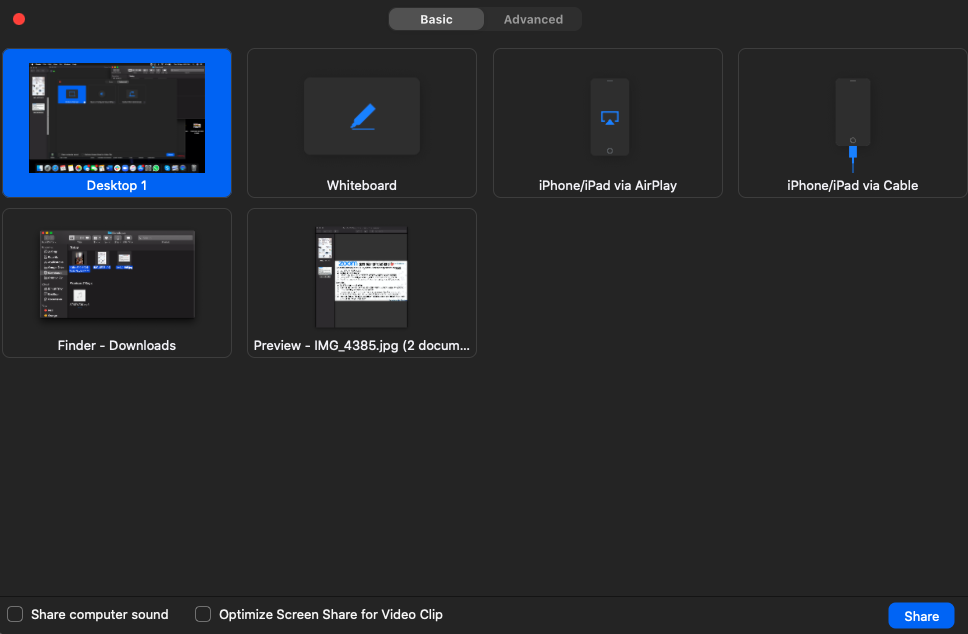
(Remember to turn on the two options at the bottom left corner of the screen - Share computer sound and Optimize Screen Share)
The in-meeting chat feature allows you to send messages to one specific individual or to the entire group, while the class is in session. You can use this chat box to send relevant links to the students during your class, or students can use this feature to ask questions or raise doubts.
💡 Tip: To avoid students chatting with each other during class and getting distracted, change the chat box settings by clicking on Chat > … > Participant Can Chat With > Host Only
A helpful link to understand this feature better: In Meeting Chat (by Zoom)
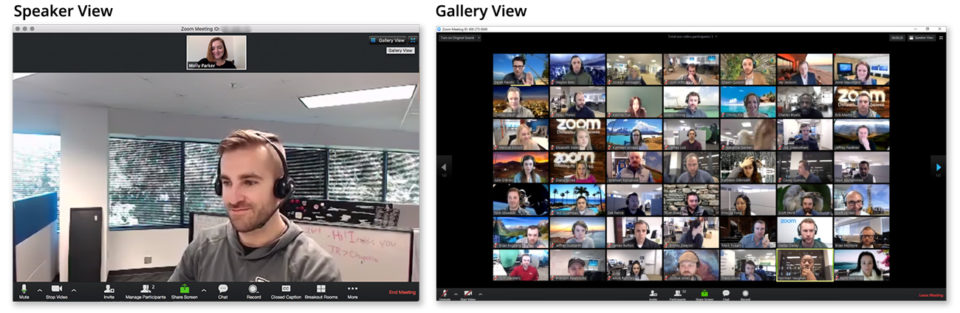
Viewing the participants in Gallery View allows you to interact with all of your students at once. You can have upto 49 thumbnails on your screen at a time. If your class has more than 49 students, you can scroll back and forth between the thumbnails to interact with all.
On the other hand, if you have a session with a class of 3 or more people, Speaker View in Zoom will switch the large video window between the people who are speaking at any given point.
A few helpful links to understand this feature better:
Displaying Participants in Gallery View (by Zoom)
Active Speaker Video Layout (by Zoom)
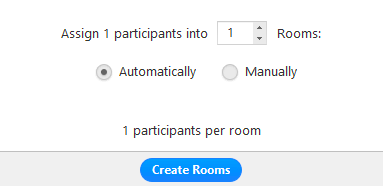
The Breakout Room feature on Zoom will allow you to split your class into groups of upto 200 students each, and assign each group to a different meeting zoom. This is especially helpful while managing large classes and also during group projects or activities as it becomes easier to coordinate between students in one group and also between the groups, as a whole.
A helpful link to understand this feature better: Enabling Breakout Rooms (by Zoom)
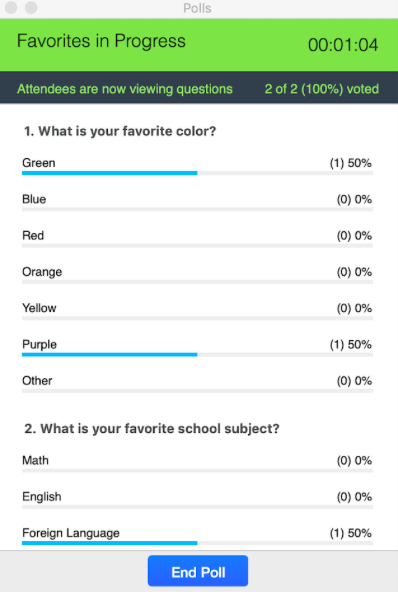
This feature allows you to create multiple choice polls during your classes. You can use this to get student feedback, conduct MCQ tests and also to get an idea of the overall opinion of your class on any particular topic. Zoom also allows you to download a report of your polls once the session has ended.
A helpful link to understand this feature better: Polling for Meeting (by Zoom)
⏺️ Post-Class:
When you record a Zoom meeting, the video, audio and chat box are recorded and converted to a file, which can then be downloaded and saved on your device or streamed from a browser. This feature helps you keep a running record of your classes, use the recorded sessions as references for your future classes, and send these records to your students to help them study better.
A helpful link to understand this feature better: Recording A Meeting (by Zoom)

Zoom and ReportCard make a super team. To know more, you can visit - Zoom Integration (by Reportcard)
If you are new to the field of online teaching or are looking for ways to promote existing classes, you can go through our Guide to Teaching Online Effortlessly.
Do spare a minute and check out Reportcard - it helps you keep track your students’ attendance, schedules and manage classes, and collaborate seamlessly with staff and students, alike.